Computational Tinkering Three Ways
Over the last few months, we've tried three iterations on a computational tinkering workshop where learners use recycled materials to build arduino powered dancing robots. I wanted to recap this series of workshops and share some thoughts about three different visual programming environments.
The idea of building dancing robots evolved out of computational tinkering and #LEGOtinkering experiments that we tried while working with the Tinkering Studio and Lego Foundation. This prompt encourages more collaboration than competition and allows participants to define their own version of success.
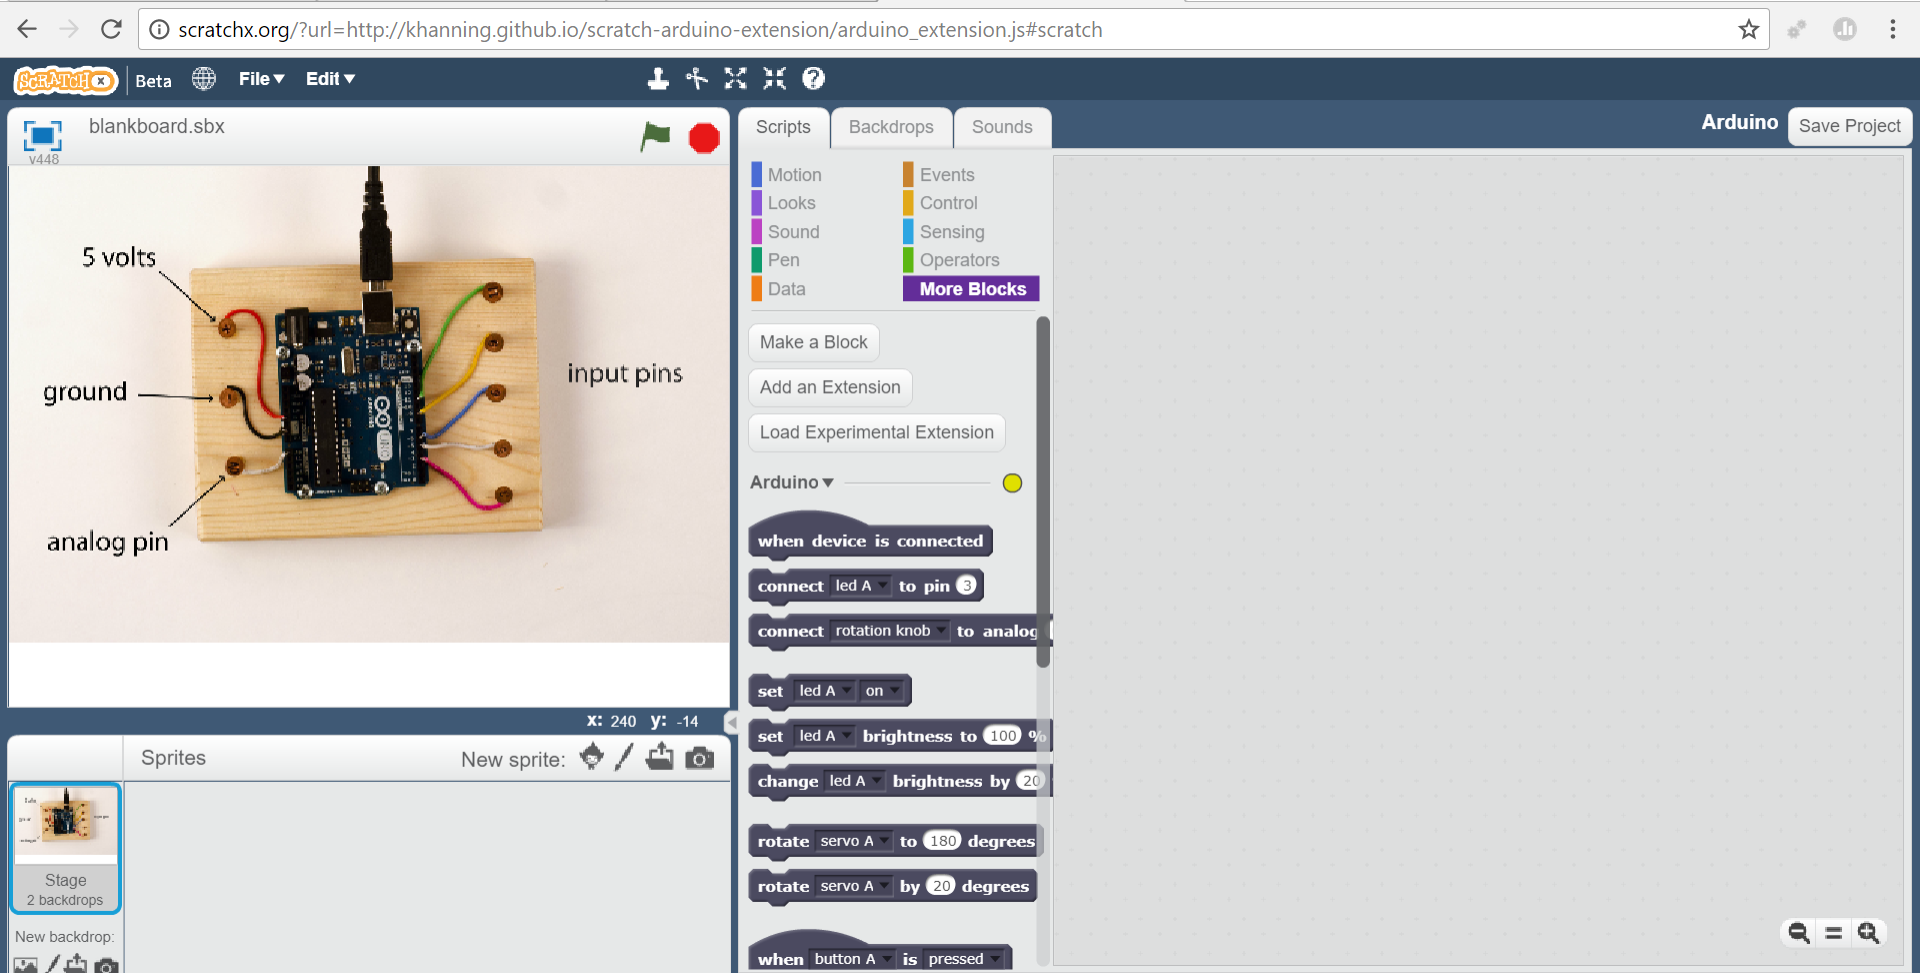
For all three workshops we used arduino unos mounted on wooden blocks wired to copper nails (a la circuit boards) to facilitate easy connections with the hardware components. These blocks were developed for the Scratchpaper activity, a programmed paper circuits workshop that Nicole and I led at MIT a couple of years ago.
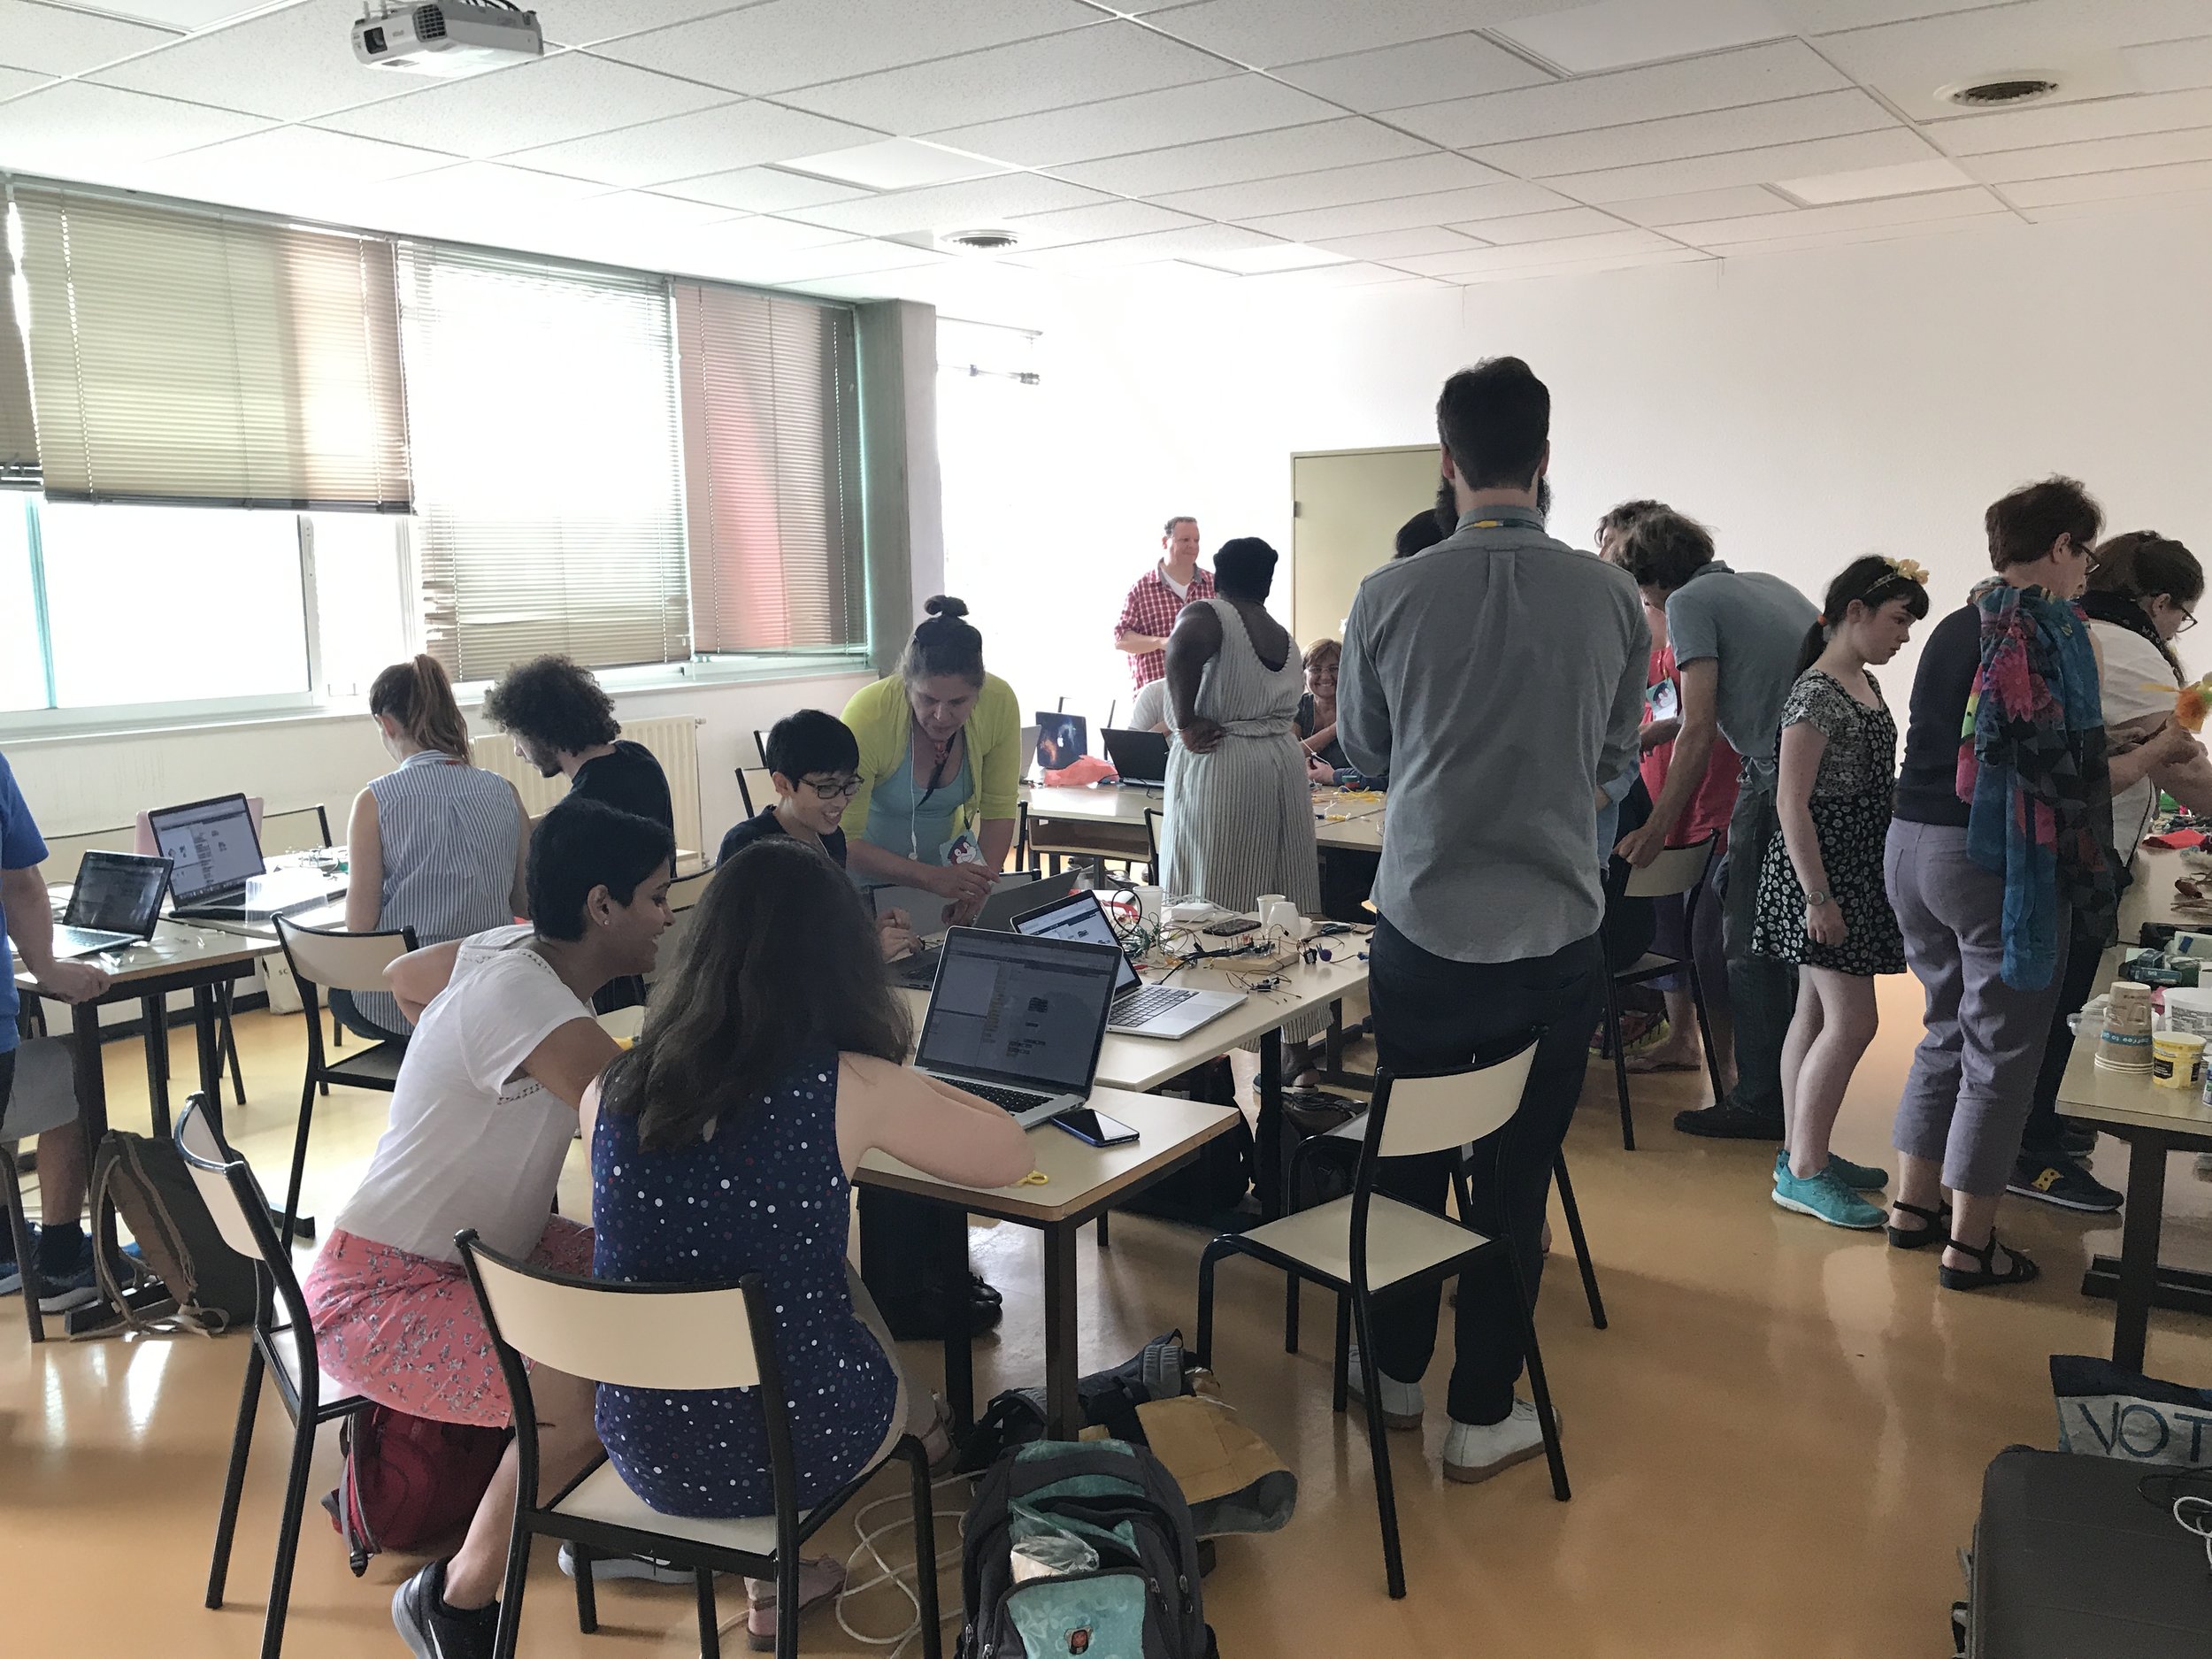
The first iteration of the dancing robot workshop took place in July at the Scratch conference in Bordeaux. I got help from friends from the ESPGG science center in Paris. For this workshop we used the scratchx extension developed by Kreg Hanning that's part of a set of experiments from the scratch team at MIT.
One of the biggest advantages of the scratchx arduino extension for tinkering is that it runs on standard firmata which means that the program updates in real time. So as you change around the blocks or the number values on the screen, the lights and motors change just as fast in the real world. This allows for lots of testing and rapid prototyping.
Another nice technical thing about the scratchx extension is that the blocks include both language that relates to the items (buttons, LEDs, switches) and also blocks that call out to the pins. It has support for about ten other languages which adds to the universality of the site.
There are many other experimental scratchx extension the homepage which add to the possibilities for creative workshops. For the dancing robots workshop, we used a spotify extension developed by Eric Rosenbaum. This addition allows people to pull in thirty second snippets of songs into their projects and make the robot move or lights blink to the beat.
A couple downsides to this editor is that it only runs in the browser, so the computer needs to be online. This could be a challenge in schools and conferences that have spotty wifi connections. There's also a complicated set of drivers and things to install which makes it difficult (and sometimes impossible) to make work.
The next version of the workshop was for a group of educators at a Maker Summit in Northwest Arkansas. When prepping the materials, we couldn't get the scratchx to work on the set of laptops, so we decided at the last minute to use a beta version of tinkercad circuits.
Tiffany Tseng, who works on the project, gave me a run though of the envionrment a week before and I was intrigued with the integration of block programming with circuit diagramming (and 3D modeling). It seems that the goal for this program is to become a one stop site for tinkering with electronics, digital fabrication, robotics and programming.
This editor translates the block-based program into text based arduino code that's displayed on the side. When you want to test your program, you have to copy and paste it into the arduino IDE and then upload the code normally. This extra step feels a little clunky but it's nice to start to get a sense of the format for text based arduino code.
A couple other nice things about tinkercad circuits is that the blocks are super intuitive and there seems to be the right set to relate to potential tinkering projects. As well, the way that the arduino text code gets generated feels very clear. I can see this as a subtle teaching tool that can lead to learners making adjustments with the text.
As well, because with tinkercad, you upload the code to the arduino board, you can unplug it from your computer, power it with a battery or wall wort and it will still run. This adds to the possibilities for adding creations to a collaborative installations or displaying inspirational examples without having to keep computers attached.
Another interesting element is that you can "build" a simulated circuit with the animated components to see how the program will work. While I would hope that workshop participants would tinker in the real world instead of relying on the digital versions, the option does allow you to try out complex circuits and gives a sense of possible components.
However, there are no extra blocks that control a program (sprites, sounds, backgrounds, etc). This wasn't really an issue for the dancing robot workshop, but for other computational tinkering activities it's a fun thing to be able to use the stage and other blocks.
Besides the aforementioned issue of having to copy/paste the text into the separate program, another downside to the program is the layout. Everything seems crammed in weird corners of the screen but that might be because it's just in beta version. As well it runs online which brings up the same difficulties as scratchx for conferences or schools with unreliable wifi.
There may be too many available options for beginners or a short workshop, but I'm really interested in seeing how this software progresses. I think especially for a longer tinkering program or summer camp, there's something attractive about only having to learn one system/site to explore fabrication, coding, electronics and robotics.
A couple days later I partnered with Angela Sofia Lombardo from Coderdojo in Bologna for a dancing robot workshop at the Fablearn 2017 conference. She had used another editor called mblocks by MakeBlocks for previous workshops so we decided to give that a shot. Makeblock is a company from Shenzhen that has a line of both robotics kits and software for use in STEM education.
The biggest advantage for Mblocks editor is that you can upload the code to the arduino without leaving the program. It formats the textual code into a less intuitive format, but it's really nice to not have to switch to IDE to get the program on the arduino board.
As well since the mblocks is an offline program it doesn't rely on having internet connection or special drivers to work. We prepared some usb thumb drives with the software and some examples to the participants and because of that the set up was the easiest of the three programs.
The screen for Mblocks is organized more like traditional scratch which feels like an intuitive way to arrange everything on the screen. Having the option of using the stage to supplement the physical projects also adds to the possibilities for personal expression. Mblocks supports more languages than scratchx and can also control different arduinos and robotics kits. This combination of ease of use and flexibility is a compelling package.
At the Fablearn workshop, the participants had a wide range of prior experience with graphical programming and arduino, but they all jumped in quickly and began experimenting. At the end of the session, there were many different creative designs.
One other software/hardware that I'd like to investigate more is using microbit and make:code. We experimented a bit with this over the summer and it worked really well for controlling LEDs, servos and sensor inputs.
I also didn't get the chance to try it for one of the dancing robot workshops, but I also know that snap4arduino is another option for using firmata for real time prototyping. If scratchx continues to have issues with the plugins and drivers, snap could be a good option to explore more.
There are lots of options for programming arduino with graphical block based code. After the experience of trying three different versions I think there are pros and cons for each editor. Scratchx is the best for tinkering with programming and has lots of creative extensions but it's quite difficult to set up the drivers and plugins to run on different machines. Tinkercad circuits has lots of potential to combine programming, electronics and robotics but in it's current beta version has some clunky elements. Mblocks feels like good solution at this point that balances friendliness with ease of use although the fact that it's not browser based could be an issue for some workshops.
We're looking forward to continued explorations of different hardware and software options and seeing how they develop over time. And perhaps more importantly, we're interested in supporting educators and designers to develop open-ended prompts and workshop themes to push the development of computational tinkering in new directions.


